
This simple tutorial for DIY board and batten walls will transform your space in as little as a weekend. It is cost effective and easy for even the newest DIYers.
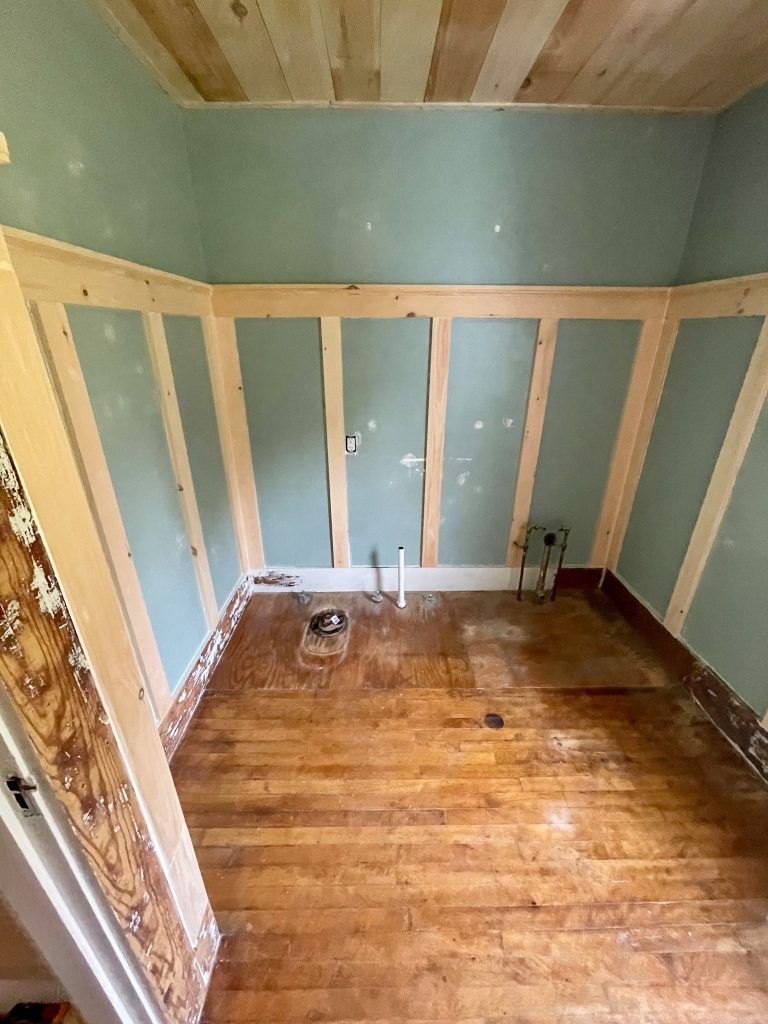
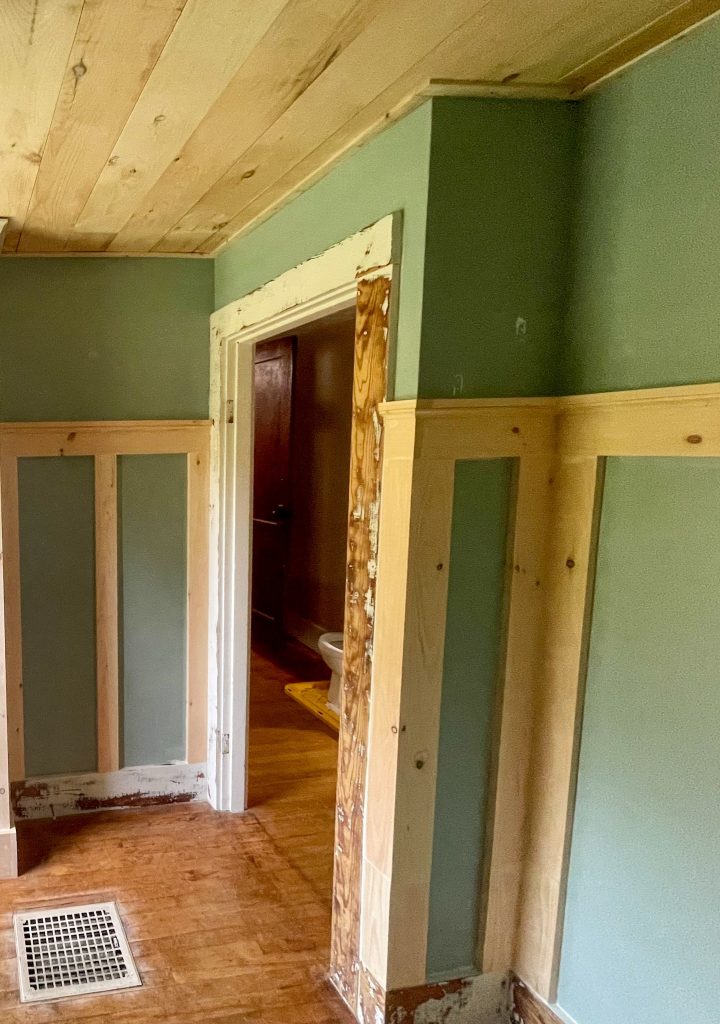
When I began to look into design ideas for our 120 year old farmhouse bathroom, I knew that I wanted to add some charm and character back into the space. DIY board and batten would do just that.
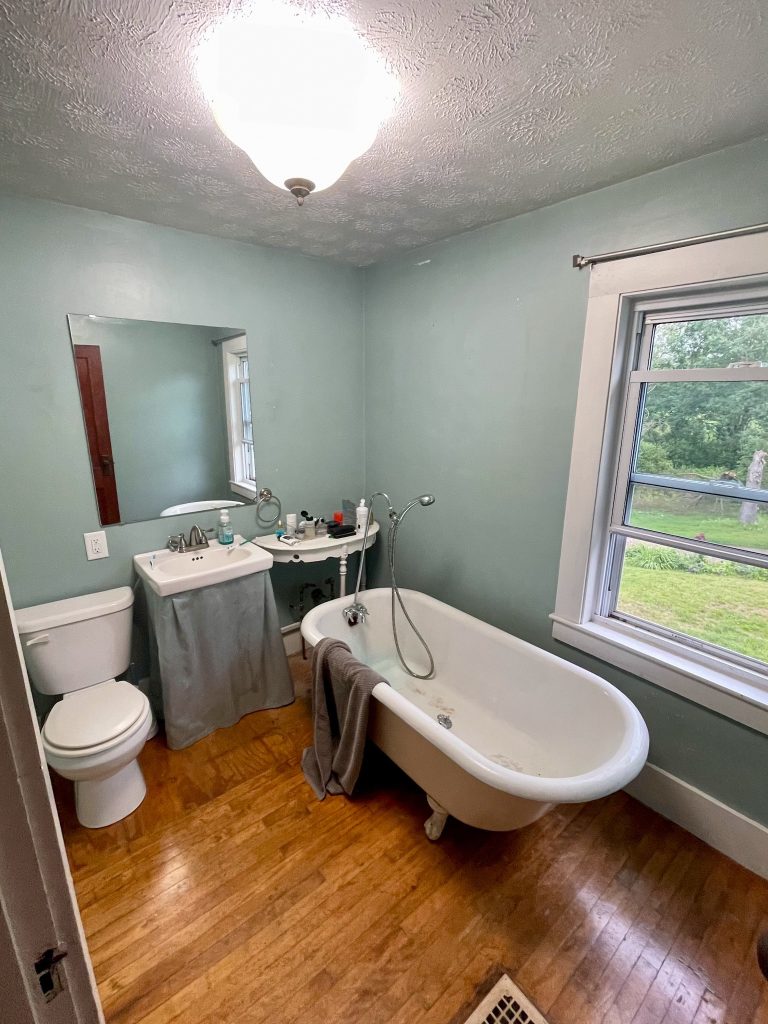
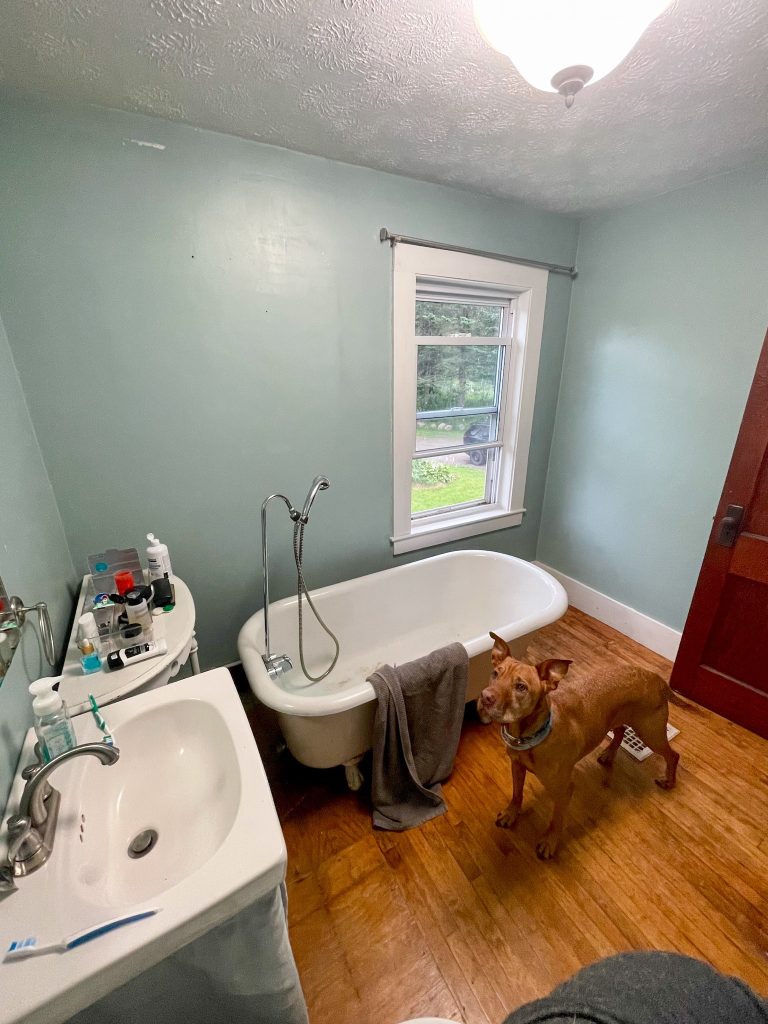
Originally the bathroom had been a boring unsightly box with only a tub (no shower), a toilet, a very dated pedestal sink, some crazy texture on the ceiling, and absolutely no storage. This was the only bathroom on the second floor and would function as the master bathroom.
We HAD to do better.
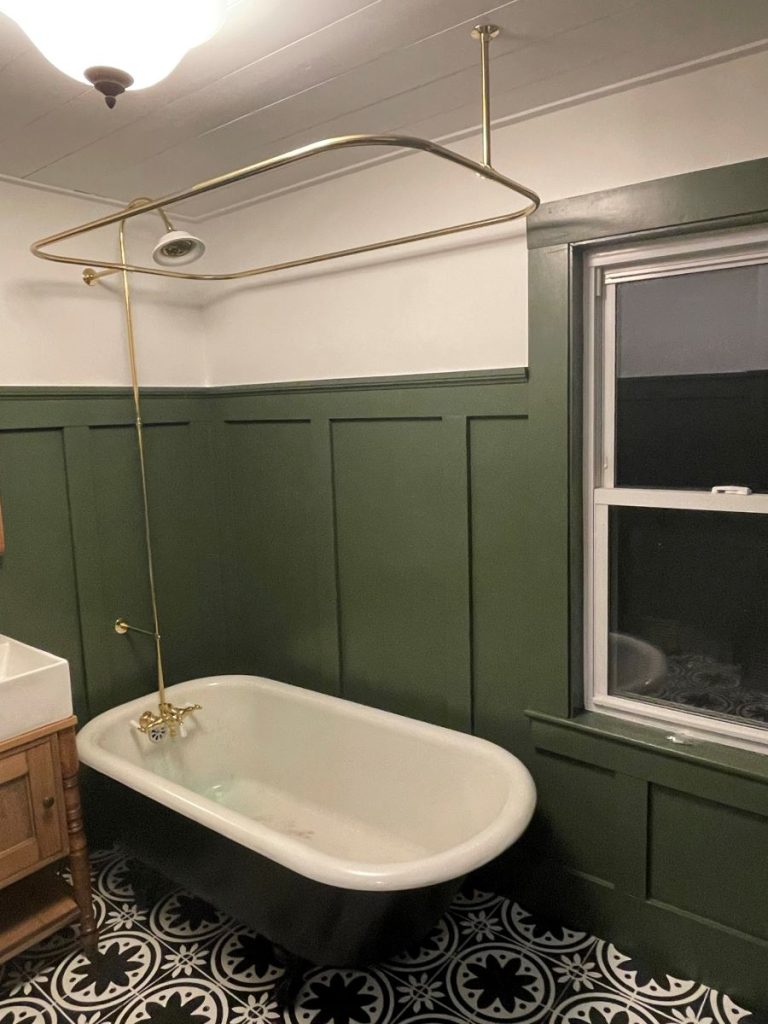
I decided to start with woodworking that needed to take place, this included adding the DIY board and batten to the walls and shiplap to the ceiling. See my ceiling shiplap post HERE.
I also added a custom built in cabinet. See the DIY Custom cabinet HERE.
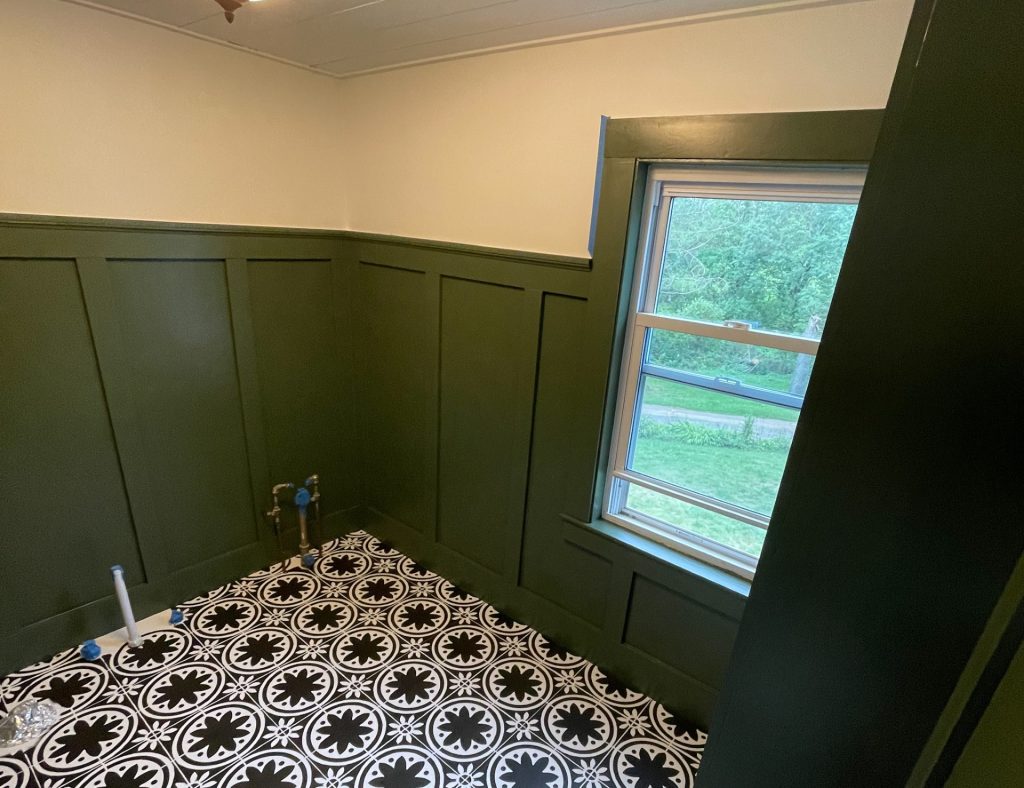
Board and batten is an incredible way to add detail, depth, and character to any space.
For our bathroom, I wanted to create a moody historical feel, with dark walls that accentuated the tall ceilings. The board and batten played a huge role in this and really gave the room something special.
See the full bathroom reveal HERE.
DIY Board and Batten Materials
- 1×4 pine boards
- 1×6 pine boards
- 1×2 pine boards
- trim pieces or chair rail moulding
- Culk, spackle, primer, paint
DIY Board and Batten Tools
- Brad Nailer
- Random Orbital Sander
- Level
- Tape Measurer
- Paint brush, paint roller
- Painters Tape
How to Install DIY Board and Batten Walls
Step 1: Design the layout of your walls
Before getting started with installation it is important to think about your space.
Some questions to ask yourself, how tall do I want the board and batten to be? How wide do I want the spaces between my boards to be?
First, empty your room.
Next take a minute to stick painters tape on your walls to visualize where you want the top of your board and batten to be. Also, look at the length of your walls, about how much space do you want between your boards? Using painters tape for this will allow you to really visualize the space.
Step 2: Set your top board
Using your tape measurer mark where you want the top of your board and batten to be.
Next measure the length of your wall at that height
Pro Tip:
- Houses are never square so if you measure the length of your wall from the ground, instead of the height at which you want your board to sit, your measurement can be off by as much as an inch.
- sanding your board before you set it to the wall will decrease dust inside your home saving you time and cleanup. Sand each board until it is smooth enough to your liking.
Cut your board to length using your miter saw.
Place the cut 1×6 board on your height mark and tack in place with 1 brad nail in the center of the board.
Place a level on top of the board and adjust, nailing the remainder of the board in so that it is secure on the wall.
Pro Tip:
- When nailing your board in to the wall adjust the angle of your nail gun up and down rather than shooting all your nails directly (perpendicular) to the wall. This alternating angle will hold the board to the wall much better.
Continue these steps until you have set the top board around your entire room.
Step 3: Set your vertical boards
Since you began in step one by planning out your vertical boards you should have a rough idea where they will be placed. Mark this on you wall.
Pro Tip:
- Place a vertical board at the start and end of each wall.
- It is not usually possible to have an exact measurement between each of your boards because each wall is a different length. To make the walls appear cohesive place your end boards first and then work on your middle boards keeping the gaps similar in measurement but not exactly the same.
Measure the space from the top of your baseboard to the bottom of your top rail, cut your 1×4 pine board to length.
Place your vertical board in its location on your mark and use one brad nail to tack the center in place. Then use a level to make sure that the board is straight up and down before nailing it completely to the wall.
Pro Tip:
- Remember, not all walls are created equal. resist the temptation to cut all your vertical boards at once. Measuring and cutting board by board will give you the best most accurate results.
Step 4: Decorative Top Rail
I chose to use a 1×2 board for the top of my board and batten to add more depth and character. This is completely optional. If you prefer to keep it simple you can always skip this step.
Measure and cut your 1×2 board and brad nail into the top of your 1×6 top board.
Next measure and cut your decorative moulding and place it below your 1×2 board. (this is the only place that I mitered the corners because of the curve of the wood.
Step 5: Caulking and Fill Nail Holes
Using a painter grade caulk, caulk all of the seams between the boards and the walls, as well as the boards and the boards.
Next use spackle or wood filler and your finger to fill in the brad nail holes being careful to wipe away any excess filler.
After the caulk and filler is dry, sand the face of the boards as needed to achive a seamless and smooth finish
Step 6: Prime Your Board and Batten Walls
Before painting use a high quality primer, like this Zinsser Shellac primer to prep your DIY board and batten wall.
Pro Tip:
- DO NOT SKIP THIS STEP
- If you do not prime your boards with a high quality primer, any knots in the boards will bleed through the paint causing staining and discoloration. Trust me! Take the time to complete this step!
Step 7: Painting Your DIY Board and Batten Walls
Using a paint brush and the wall paint of your choice paint all of your corners and trim.
Using a 4 inch or 6 inch foam roller paint the larger portions of walls and boards. I also chose to paint my door trim to match and the effects are just stunning!

I absolutely love how our DIY board and batten walls turned out and cannot wait to see how the rest of the room comes together!
This was such an easy project and made such an impact on the space. It is absolutely something that could be done by a novice or beginner DIYer with just a couple tools and a little bit of time.
Leave a Reply